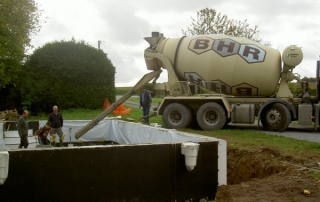
Pipes and drains

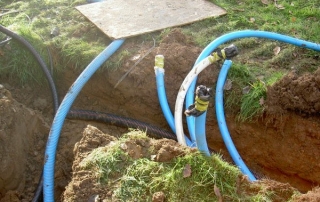
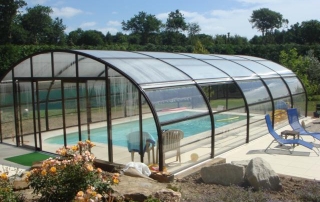
There are various pipes around the outside of the swimming pool to take the water to the sand filtration unit, which is compulsory for a “public” pool, which is what this is considered to be. The pump then takes the water through the heat pump and brings it back to the pool – it will circulate the entire volume of water (70m3) in one hour. There is also an additional tube, which will feed the waterfall feature. These have to be covered in fine sand to protect them, before we can infill with gravel.

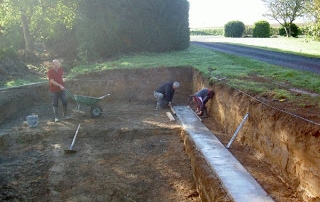
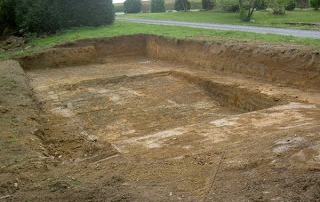
The same day, we excavated a couple of trenches. One to take a drain from around the pool in case the ground gets waterlogged and disturbs the pool structure. The other trench was to feel electricity to the pump house. These were quickly back filled (before I had a chance to get the camera out) and you would almost never know there were there!

All of this work was washed down with a beer for the boys, whilst I did the school run!


By |2017-11-11T12:45:35+01:00novembre 29th, 2010|Property updates|Commentaires fermés sur Pipes and drains

Concreting the base for the swimming pool

The next step was to concrete the floor, the mix had to be very dry in order for us to form the rounded bottom of the deep end – this made it very hard to move it around and to smooth it down. In addition we had too much (for the walls we didn’t have enough!) cement – so we ended up shovelling lots out and putting it around the base of the walls outside. Unfortunately you can’t send concrete back and get a refund! Hey, ho!


By |2017-11-11T12:49:56+01:00octobre 11th, 2010|Property updates|Commentaires fermés sur Concreting the base for the swimming pool

Shed

The second shed has now come down – this was more difficult because I wanted to keep the wood – solid oak – for use in other projects, so it could not be bulldozed. Thanks to Yves, Hervé and Jeff for their help – we started at 10am and finished at 4.30 pm – payment was by means of coq au vin at lunchtime and a few beers at the end!


By |2017-11-11T11:44:38+01:00octobre 8th, 2010|Property updates|Commentaires fermés sur Shed

Swimming Pool project

In order to make the gites a bit more saleable (two bad years after the financial crisis). I am going to put in a heated, covered 10m x 5m swimming pool. The pool will be heated by a heat pump (a bit like a fridge in reverse) and will be covered by a perpex cover which opens up either partially or fully on both sides.

Here is a photo of a similar pool


By |2017-11-11T11:47:58+01:00septembre 29th, 2010|Property updates|Commentaires fermés sur Swimming Pool project

Pomme finished

Hooray! It’s finished!

I started to renovate Pomme in the middle of January, four months ago. I have replaced the staircase, doors, and windows. A wall has been knocked down, a ventilation system put in, cut granite stones for the front step, decorated all the walls, replaced damaged doors in the kitchen and laid a laminate floor upstairs.

Several coats varnish, wood stain, paint later, I have replaced all nets and curtains, bought new furniture, and, even though I say it myself, I am really proud of it.

The finishing always takes more time than you anticipate and I had to move the furniture back in on the 3rd May due to the next door gite where I was storing being rented out. So I have taken three weeks to complete the finishing touches.


By |2017-11-11T11:10:56+01:00mai 24th, 2010|Property updates|0 Comments

Staircase

The main reason for renovating Pomme gite was because of the staircase. The original staircase had been put in ‘on a budget’ and was a straight, open treaded pine staircase. You can see it behind the rocking chair on the left of the first picture. Because people often don’t like open treaded staircases, the previous owner had nailed a piece of plyboard on the back. The problem with this is that the treads were not wide and now your feet could not poke through to the other side, making it feel even more like a ladder!

Very early on, we took off the piece of plyboard, but there was still a problem that where the stairs arrived on the top floor it was on the side the building under the sloping roof. The ceilings are very low and it meant having to bend over at an angle to step onto the upstairs floor. This was acceptable going up, but going down took a bit of getting used to.

Generally people like the gite, finding it cosy and full of character. However during the five years here, I have had two older clients who were not happy at all with the stairs, happily they were in quiet periods and I was able to re-house them in other gites.

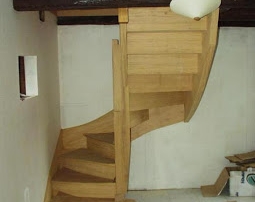
The new stairs had to be made to measure, and my main aim was to have them arrive in the middle of the room upstairs, so that the sloping ceilings were not and issue.

Stairs take up a lot of room downstairs, so the solution was to move them to one end of the gite and to turn through 90° twice to arrive at the top.

The stairs took about a week to install, the carpenters also built me a stairgate at the top, which I am really pleased with. They are made in a hardwood called Movingui, which is yellow/orange in colour. I experimented on scraps of wood with various stains and varnishes, and eventually decided that it was best with just a clear varnish (the upstairs photo shows the first coat of varnish on the left hand side).


By |2017-11-11T11:08:32+01:00février 28th, 2008|Property updates|0 Comments